Open topic with navigation
FOP Transfer Using Existing Instruction
See Position Instructions for information about viewing and deleting position instructions.
To request an FOP transfer without using a Position Instruction
- Click Funding > Position Transfers.
- If
you have a master account or multiple accounts, use the Account Selector to search for and select the account for which you want to request a position transfer.
- In the Transfer Method list, select Free of Payment.
- In the Type list, select Use Instruction. This option allows you to use an existing Position Instruction or create a new one.
- In the Instruction list, select a previously-created Position Instruction from the list.
The instruction details appear on the screen.

- Select Withdraw or Deposit as the FOP Type, then begin adding assets to your FOP transfer.
- Select an asset type to transfer, then click the Add button.
- Enter the required information for each asset to be transferred, then click Add.
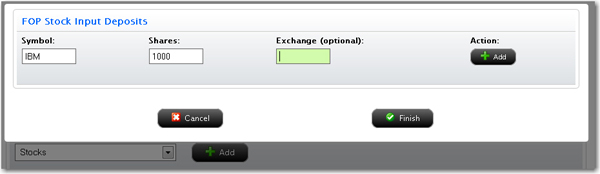
Each time you click Add, the asset you specified is added to the list of assets to transfer.
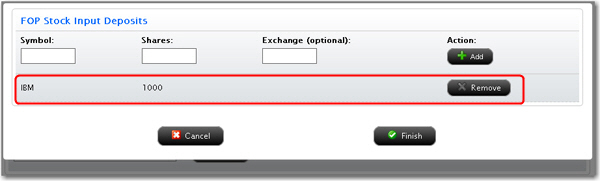
- Click Remove to remove an asset from the list.
- When the list of assets to be transferred is complete, click Finish.
- Repeat Steps 7-10 for each asset type.
- On the FOP Signature page, review the information on the page. Delete assets from the list or add more assets to transfer as required. Then type your name in the Signature field and click Continue.
- On the next page, verify your identity by typing your password and the confirmation number we emailed you in the fields provided.
If you do not receive a Confirmation Number by email, please check your junk email folder as sometimes email filters block messages.
Or click Resend Confirmation Number to receive another confirmation email.
Or click Cancel to cancel the transfer request.
For more information