Open topic with navigation
CRM Groups
You can organize your contact records into groups. On the CRM home page and Advanced Search page, the list of records can be sorted by Group. On the Advanced Search page, you can add and remove one or more contacts to and from existing groups or send bulk email to members of a group.
Use the Manage Groups page to:
To view the current members in any group
- From the CRM home page, click the View Groups icon.

The Manage Groups page opens. The Manage Groups page lists all of your current groups, along with the number of contact records in each group in parentheses next to the group name.

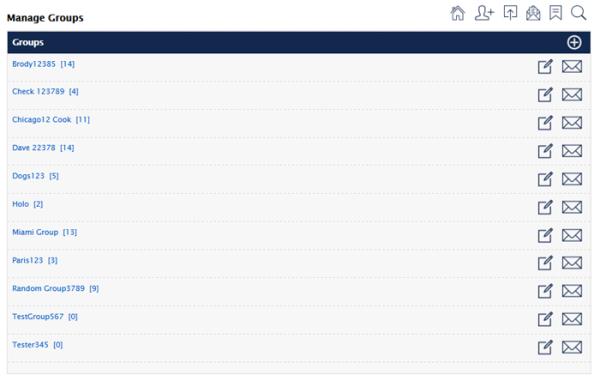
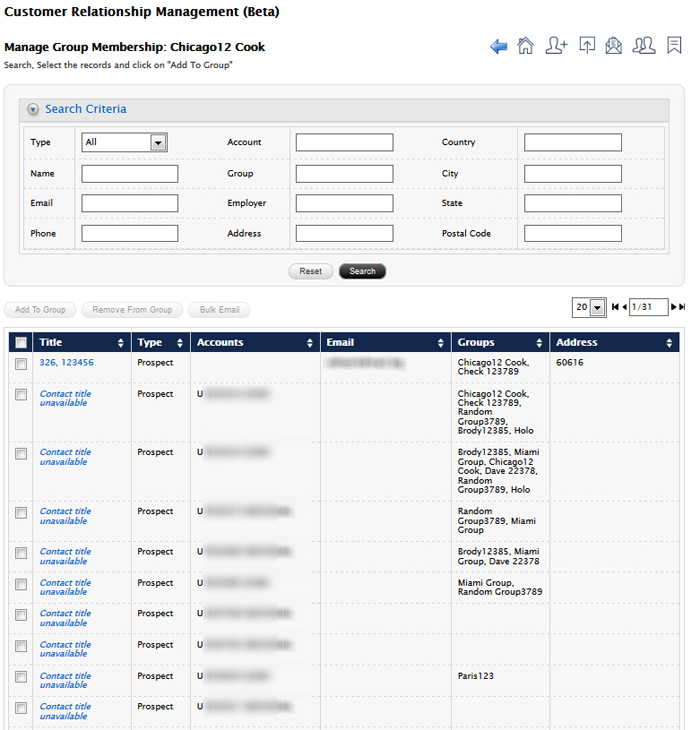
- Click the name of the group whose members you want to view. The Manage Groups Membership page opens, displaying the expanded Advanced Search Criteria panel at the top of the page and the members of the selected group below.
To add a new group and add members to the group
- From the CRM home page, click the View Groups icon.
The Manage Groups page opens.
- Click the Plus Sign icon on the upper right of the group list.

- In the Create Group box, type the name of the new group, and then click Save.
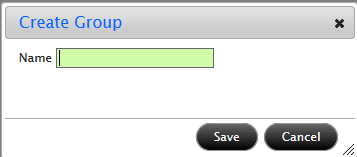
The new group appears in the group list.
- Click the name of the new group to open the Manage Groups Membership page.
- Use the Search Criteria panel to search for the contact records that you want to add to the new group. Enter criteria into the desired search fields, and then click Search. The list of contact records updates to match your search.
- Click the check box next to each contact that you want to add to the new group. As soon as you select one record in the list, the Add to Group button becomes active.
- Click Add to Group.
- In the Add to Group box, select the new group from the drop-down and then click Save.
The contacts you selected are now part of the new group you created.
To delete an existing group
- From the CRM home page, click the View Groups icon.
The Manage Groups page opens.
- Click the Edit Group icon on the row for the group you want to delete.
The Edit Group bar opens.

- Click the red X icon to delete the group. Click the blue arrow to close the Edit Group bar.
- Click OK in the confirmation message.
The group is deleted.
To rename a group
- From the CRM home page, click the View Groups icon.
The Manage Groups page opens.
- Click the Edit Group icon on the row for the group you want to delete.
- The Edit Group bar opens.
- Type a new name for the group in the text field, and then click the green check mark icon to rename the group. Click the blue arrow to close the Edit Group bar.
To send a bulk email to all members of a group
- From the CRM home page, click the View Groups icon.
The Manage Groups page opens.
- Click the Bulk Email icon on the row for the group you want to delete.

The Manage Groups Membership page opens with the list of contacts who are members of the selected group.
- Click the check box next to each contact to whom you want to send a bulk email. As soon as you select one record in the list, the Bulk Email button becomes active.
- Click Bulk Email.
A blank email with the To field already filled in with the selected contact emails opens.
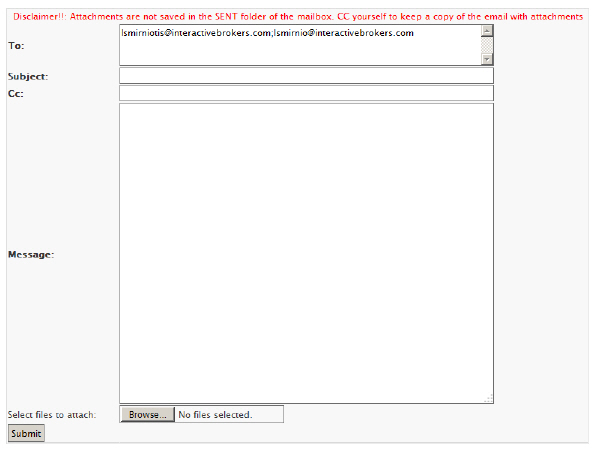
- Enter a subject, optionally enter email addresses in the Cc: field, enter the text of your email, and optionally attach files, using the Browse button to search and select files on your computer.
- Click Submit to send your email to all of recipients.
Attachments are NOT saved in your Rackspace Sent folder. CC yourself to keep a copy of the email with the attachments.